WEBKITS
IMAGE EDITOR
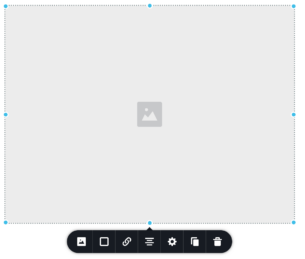
The image editor lets you add photos and images to your website in jpg, png, WebP or svg file formats.
Simply click on the image place holder to activate the tools.
the first icon lets you choose the image you would like to load into the place holder.
For images already loaded, you can colour correct images with the filter, of apply mask shapes over the image.
Zoom the image or let the original image be open in a light box pop up when clicked.
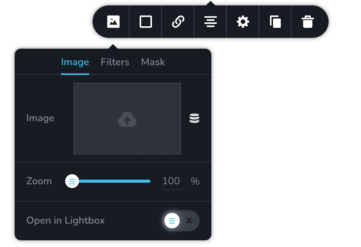
To add a new image, click the cloud icon to open the media library and select or upload a new image.
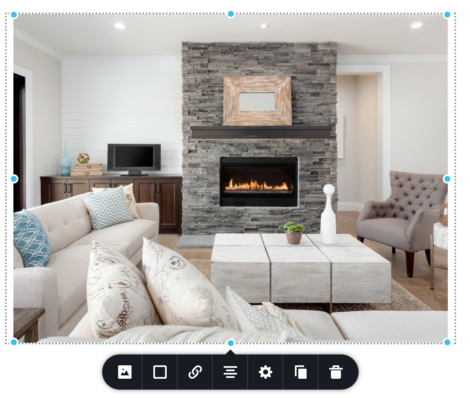
After the image has loaded in you can resize it by either clicking the image and clicking on one of the blue dots located at the corners and mid-points.
You can then drag to resize the image.
Alternatively, you can lick the gear icon and set the width and height manually with the sliders
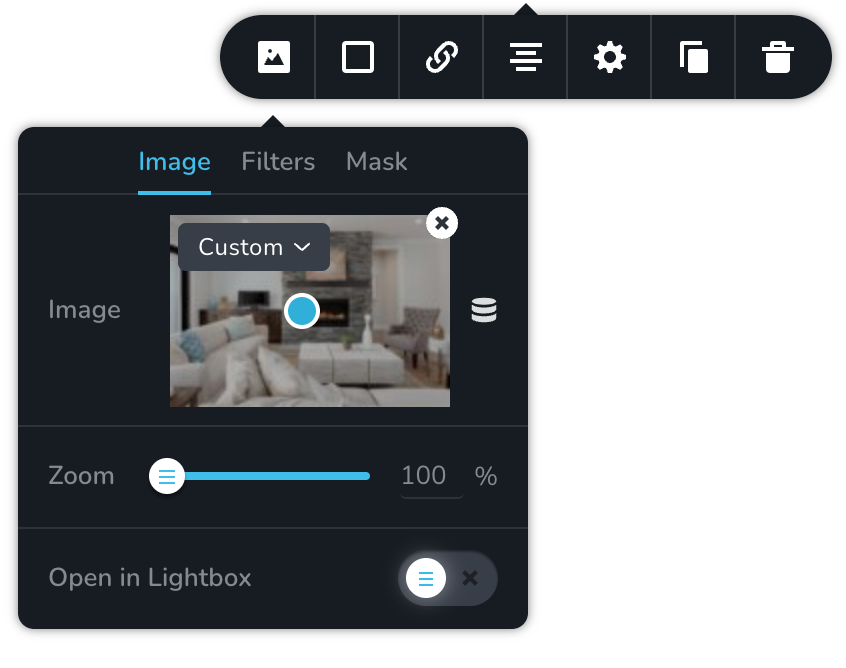
For images larger than the container you can reposition the image using the blue dot.
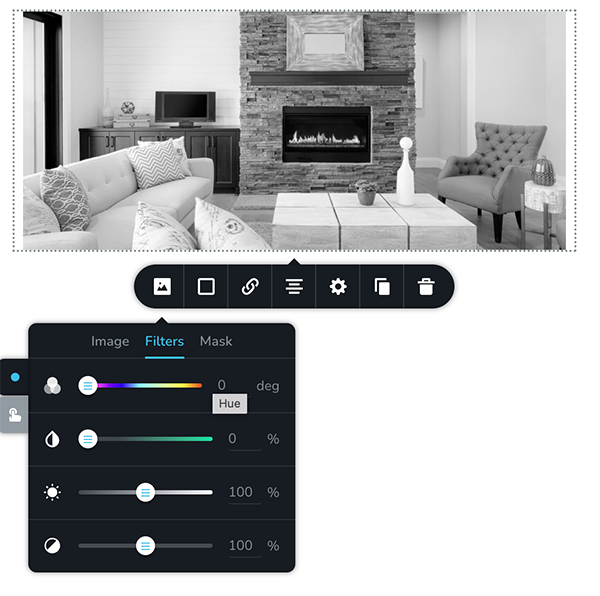
The colour filter lets you adjust the colour, hue and saturation of the image on either the default view or on hover.
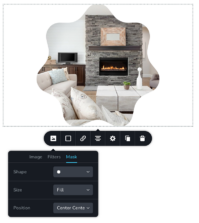
The mask effect lets you cut out an image using either a predefined shape or upload your own.
To save time and ensure your image load fast we recommend never uploading an image larger than 1200px wide, also if you upload your images to tinypng.com first to compress them, then download and upload to your website, you will ensure your images are seo friendly.
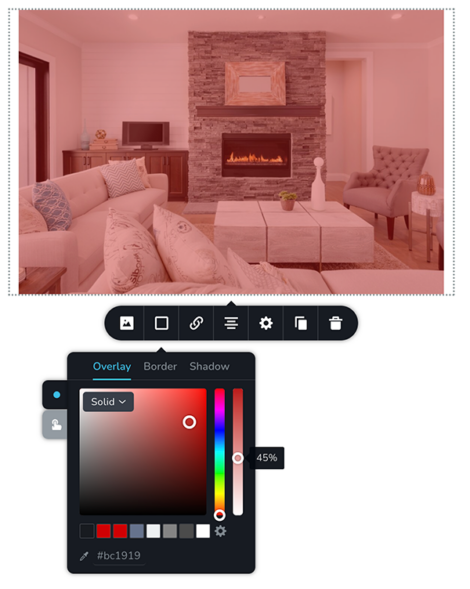
OVERLAY:
The colour tab lets you add a colour overlay to your images. You can choose from a solid colour or a gradient. By adjusting the opacity you can control how much colour is applied to the image. Colour can be applied to the static image or hover state.
BORDER:
The border tab in the image editing tool allows you to add a border to your image. You have the option to adjust the color, thickness, and even control each side of the border individually. This feature gives you the flexibility to customize the border of your image to your liking.
SHADOW:
The shadow tab in the image editing software allows you to add a shadow to your image, which can be either inset or outset. You can also adjust the colour and opacity of the shadow to achieve the desired effect.
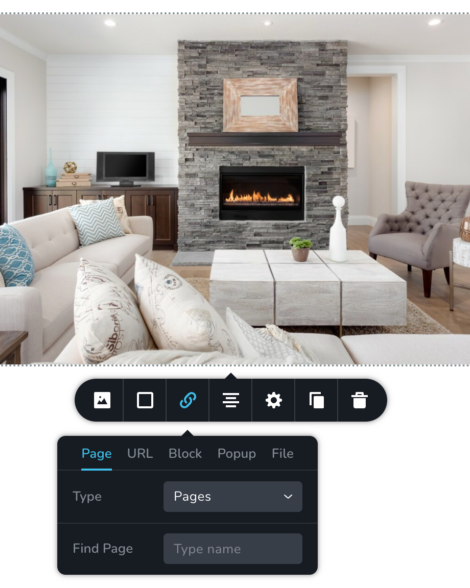
To make your image a clickable link, select the link icon and choose from one of the following options:
PAGE:
This lets you select a page on your site to link to.
URL:
This lets to paste or write in a web address or email address to link to.
Note: If you are adding an email address you must type: mailto: before the email address. i.e. mailto:info@website.com
BLOCK:
This lets you link to a block on the same page. Commonly know as an anchor link, you can create an auto scroll link to another section of the same page.
POP UP:
The pop up lets you create a pop up window on the page when clicked. It comes with many templates, or customize your own. This is an advanced feature so feel free to reach out to us if you need a one-on-one tutorial.
FILE:
This lets you link to a file, like a pdf document. You can directly upload from this tab or select from the media library.
The justify tab lest you adjust how the image site within the block. Left, Centre or Right Justifications are available.
The settings tab lets you control the width and the weight manually either by percentage or by pixels.
Styling: Give you more advanced options like padding, margin and corner radius.
Effects: Allow you to add animated effects to the entrance, hover and scroll types.
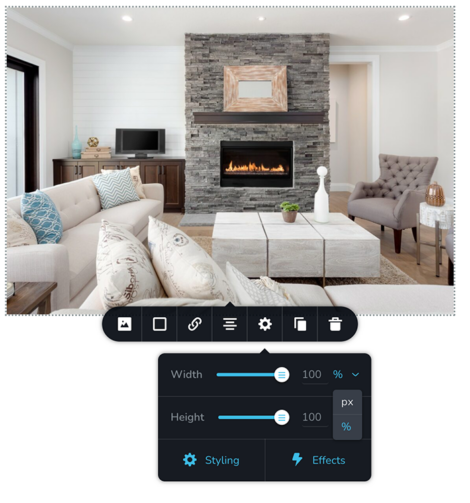
The clone will duplicate the image and settings.
Trash will delete the image.

PROFESSIONAL REAL ESTATE WEBSITE SOLUTION WITH CREA DDF LISTINGS.
613-967-2191 | Owned and Operated by curious projects inc.